If you think in outlines and like lists, you have to check out Opal. It is simple outlining software done right. It should be. Opal has been around since 1986 in its various incarnations. Originally called Acta, and now called Opal, it has a very long and rich heritage. You can read about its history here.
Usage:
Firstly, it is incredibly fast. It launches instantaneously. Instantly responsive software, it is an absolute treat to use. It is an outlining program, so it looks like this:

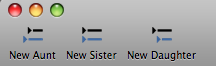
Very interestingly, it conceptualizes the levels of an outline as aunts, sisters and daughters. The hierarchy is Aunts>Daughters. Sisters are peer-level topics.
This is explained through the next two diagrams:
Topics at the root of the outline are aunts. They might have sisters.
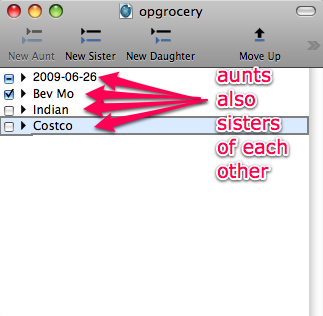
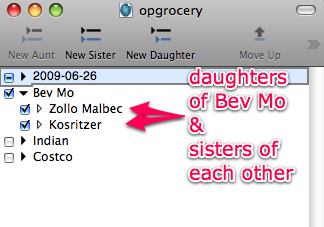
Daughters are descendants of aunts and they are sisters to each other.
You hit enter to get a new topic, or you use the toolbar buttons. You click on the New Aunt button to get a topic at the level above where you are in the outline. Anytime you are working in the outline, you can click the New Sister button to get another topic at the same level of the outline that you have been working on. To get a topic at a level lower than the one you are working on, you can click on the New Daughter icon.
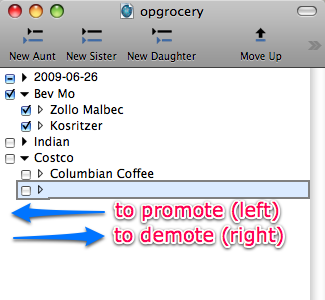
I must say that I much prefer keyboard commands to clicking on icons. Opal lets me do this easily. I hit return to get a new topic, then I can choose to keep it at the level it is or to promote it, I can press the keyboard command: Command +Shift+L (for left). To demote it, I can press the keyboard: Command +Shift+R (for right). I love this arrangement of the keyboard commands. Visually, taking a topic left, promotes it, while taking a topic right, demotes it. Very intuitive. If you don't like keyboard commands, and have to use the mouse, the icons on the toolbar perform the same functions.
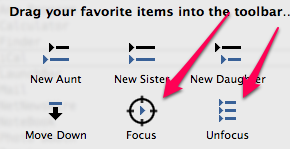
Usage Notes:You need to add a couple of icons to the toolbar. Go to the View>Customize Toolbar... option.
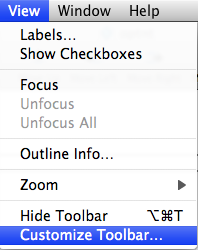
Take the two icons, Focus and Unfocus, and add it to the toolbar.
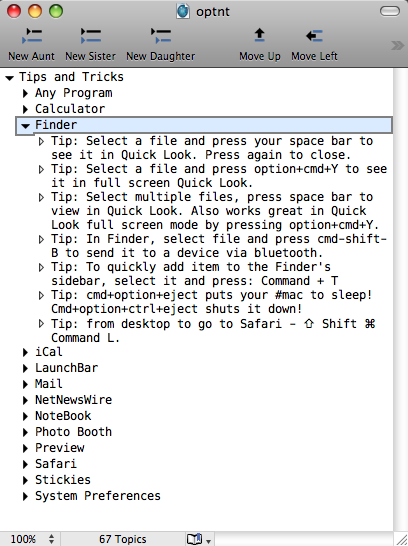
What do these do? You see the document in the following figure:
I want to work only on the Finder section and ignore the rest of the document. This becomes even more important when I have a lot of topics and sub-topics in the document. Just press the Focus icon in the toolbar and you get this:
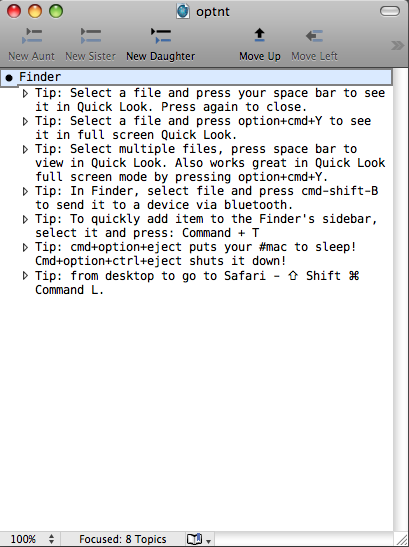
Work on your section and press the Unfocus icon to get the whole document to concentrate on again. Very useful, when you want to dig deep into parts of an outline.
Usage Note: You get checkboxes by going to the View>Show Checkboxes menu item.
Usage Note: Assign keyboard commands to Focus, Unfocus and Unfocus All. The program doesn’t ship with keyboard commands for the Focus, Unfocus and Unfocus All menu options. You might need those. Go to the Keyboard and Mouse preference pane. Click on the Keyboard Shortcuts Tab.
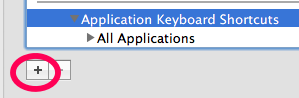
Scroll to the bottom of the list. Highlight Application Keyboard Shortcuts and click on the + button at the bottom of the dialog box.
You will get a drop down sheet.
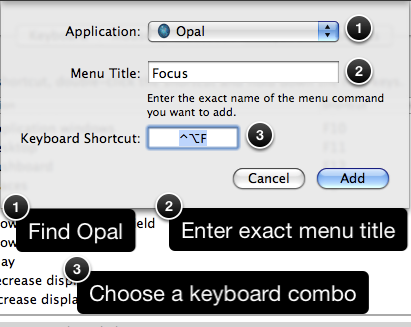
The steps are illustrated in the figure. After completing the steps, press the Add button. Repeat the process twice more with the only changes being the Unfocus and Unfocus All, Menu Title entries. Now you have three keyboard commands which make this feature much more easier to access.
Usage Note: When you mount the disk image of Opal, you will find a PDF file on the image called All About Outliners. You should read this to get an excellent overview of what you can expect from an outlining program.
Recommendation: There are lots of outliners available in the Macintosh marketplace. One of the main ones is a product called OmniOutliner which I am going to cover in a future post. Opal more than holds its own in this marketplace. It is fast, extremely responsive and very intuitive. The software seems to meld away to the background and lets you concentrate on the task in hand, making outlines. It is very well-thought out software with a rich heritage which I am falling in love with. It definitely has found a place in my workflow.