Tip: Select a file and press your space bar to see it in Quick Look. Press again to close.
Tip: Select a file and press option+cmd+Y to see it in full screen Quick Look.
Tip: Select multiple files, press space bar to view in Quick Look. Also works great in Quick Look full screen mode by pressing option+cmd+Y.
Showing posts with label tip. Show all posts
Showing posts with label tip. Show all posts
Sunday, June 21, 2009
Tuesday, May 5, 2009
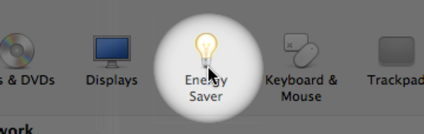
System Preference and Caffeine: No. You can't go to sleep.
How do I make my computer stay awake? You can go to the Energy Saver preference pane.
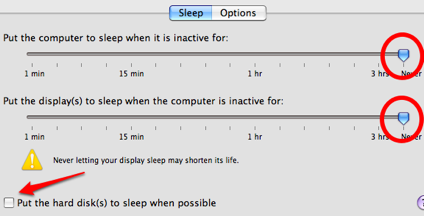
Drag the two sliders highlighted in the picture to the extreme right. This ensures that the computer and the display never go to sleep. Uncheck the "put hard disk(s) to sleep when possible" check-box. You are now ready to stay absolutely awake.
Does this sound like too much work?
You can always get Caffeine to do the job for you. Caffeine is a tiny program which sits in your menu bar. Click it to disable automatic sleep and click it again to get your system energy saving settings back. Caffeine gives you the ability to set up how long you want your Mac to be awake.
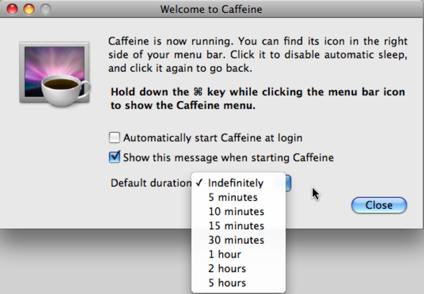
Caffeine also gives you a visual representation of when it is working. Normal sleep is an empty white coffee-cup and awake is the same coffee cup with coffee in it.

Usage Note: To quit, click on the menubar icon while holding down the Command key. You are going to get a drop-down menu and you can quit the program from there.

Drag the two sliders highlighted in the picture to the extreme right. This ensures that the computer and the display never go to sleep. Uncheck the "put hard disk(s) to sleep when possible" check-box. You are now ready to stay absolutely awake.
Does this sound like too much work?
You can always get Caffeine to do the job for you. Caffeine is a tiny program which sits in your menu bar. Click it to disable automatic sleep and click it again to get your system energy saving settings back. Caffeine gives you the ability to set up how long you want your Mac to be awake.
Caffeine also gives you a visual representation of when it is working. Normal sleep is an empty white coffee-cup and awake is the same coffee cup with coffee in it.
Usage Note: To quit, click on the menubar icon while holding down the Command key. You are going to get a drop-down menu and you can quit the program from there.
Wednesday, April 29, 2009
Unarchiver and Stuffit Expander: Decompressing archived files
The built-in compress and decompress function available in Leopard is good, but sometimes you get files from people in the not-so-popular compressed formats like Tar-GZip, Tar-BZip2, Rar, 7-zip, and so on. How do you deal with those?
There are two very good solutions available: Stuffit Expander and Unarchiver.
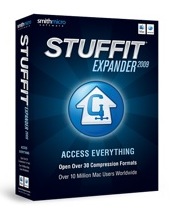
Stuffit Expander is a very good solution available from mysmithmicro. It handles a wide variety of formats and is mainly made available for the company to sell their full-featured Stuffit Deluxe program.
The Unarchiver is a freeware open-source solution.
Both programs work the same way. You highlight/choose a compressed file or a bunch of compressed files in the Finder, invoke the contextual menu (right click or ctrl+click the mouse) and a drop down menu shows up. Go to Open With.... and choose any of the two solutions.
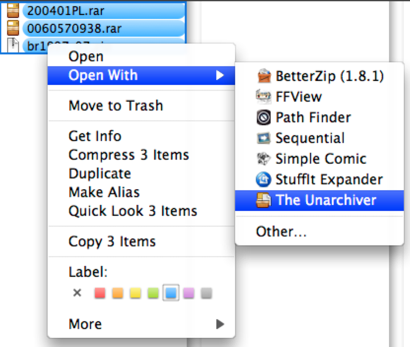
Both programs handle the task of decompressing compressed files. They both do it well. Take your pick or since they are both free get both.
There are two very good solutions available: Stuffit Expander and Unarchiver.
Stuffit Expander is a very good solution available from mysmithmicro. It handles a wide variety of formats and is mainly made available for the company to sell their full-featured Stuffit Deluxe program.
The Unarchiver is a freeware open-source solution.
Both programs work the same way. You highlight/choose a compressed file or a bunch of compressed files in the Finder, invoke the contextual menu (right click or ctrl+click the mouse) and a drop down menu shows up. Go to Open With.... and choose any of the two solutions.
Both programs handle the task of decompressing compressed files. They both do it well. Take your pick or since they are both free get both.
Monday, April 27, 2009
LaunchBar: Open Multiple files at once
This is one of the cool tricks you can use for LaunchBar 5.0 Beta.
Step 1: Make a folder in your documents folder (cmd+n). Name it. Choose a small name. In this case "lbb" is the name I chose.
Step 2: Make aliases of the files you want opened (cmd+l). Or, just highlight the files in the folder, hold down the cmd and opt key and drag the files into the folder you created. If you noticed, what you dragged are file aliases and not the actual files. Alias files are distinguished by having the little squiggly arrow in the bottom left corner of the icon.
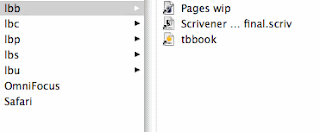
Step 3: Now go to LaunchBar. Update the index. Type in the name of the folder you want. In this case, "lbb". Hold down the Ctrl key and hit return.

Voilà. You have all the files you wanted loading automatically.
Usage: You might have noticed that you work in sets. A set of files/applications when you are online, a different set of files/applications when you are doing web research, a different set of files/applications when you are doing homework. You can set up specific folders for all these tasks and have aliases of the files/applications in them, that way when you need to switch between tasks, you launch the contents of a particular folder instead of each of the items individually. Saves time and makes you feel like a LaunchBar guru.
Subscribe to:
Posts (Atom)